


- Top >
IMAP setup example for Mac Mail
Introduction
The contents shown here have been confirmed to operate under the following environment.
Device: MacBook Air
OS: Mac OS X (Ver.10.10.1 Yosemite)
Mail Ver. 8.1 (standard email software)
Please perform the following procedure.
When setting up, Keio Apps ID is required.
Procedure 1: Setting up in the Gmail
-
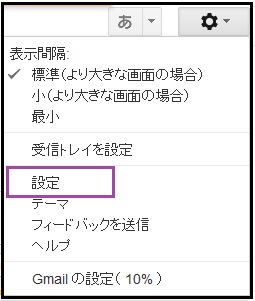
Log into the Gmail, and then click the gear icon in the top right corner.

-
Click "Settings"
-
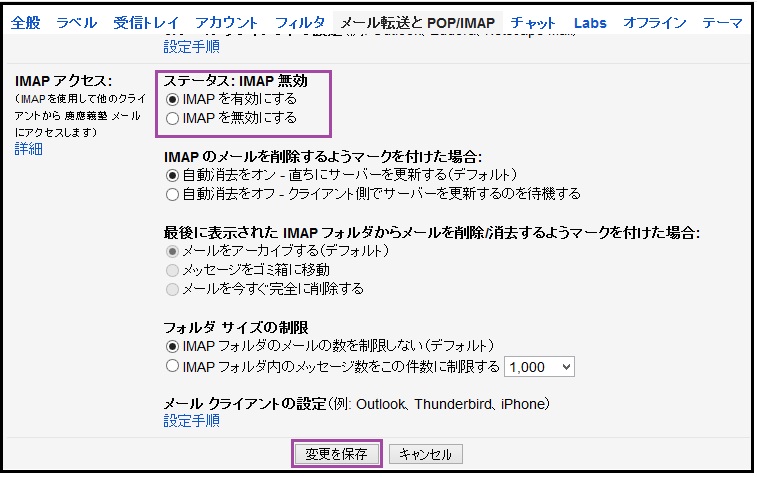
Click "Forwarding and POP/IMAP".

-
Turn on "Enable IMAP" in "IMAP Access", then click "Save Changes"
Procedure 2: Setting up in Mac Mail software.
-
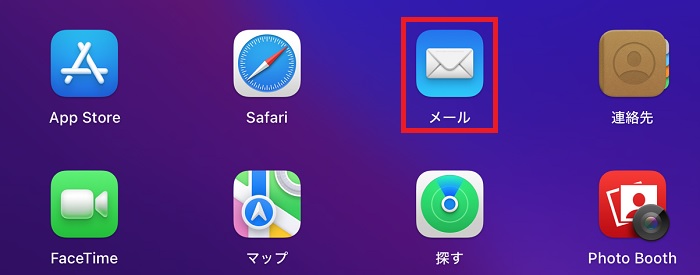
Click on the [Email] icon in the Dock at the bottom of the desktop or in the application.
-
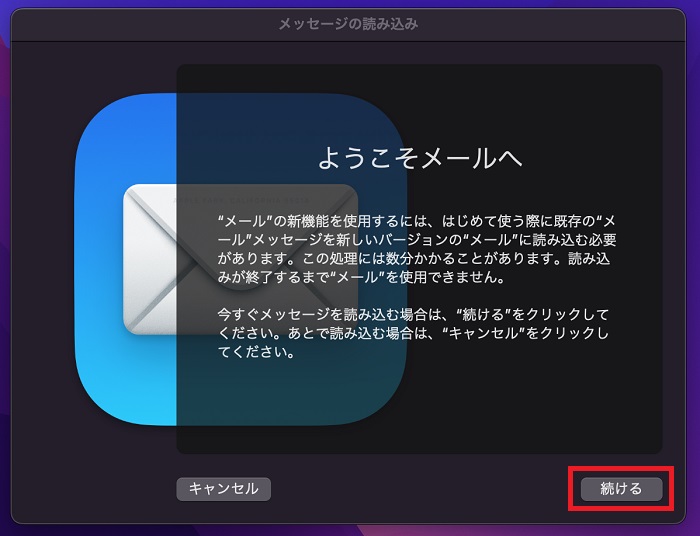
Click on [Continue] when the [Welcome to Email] screen is displayed.
-
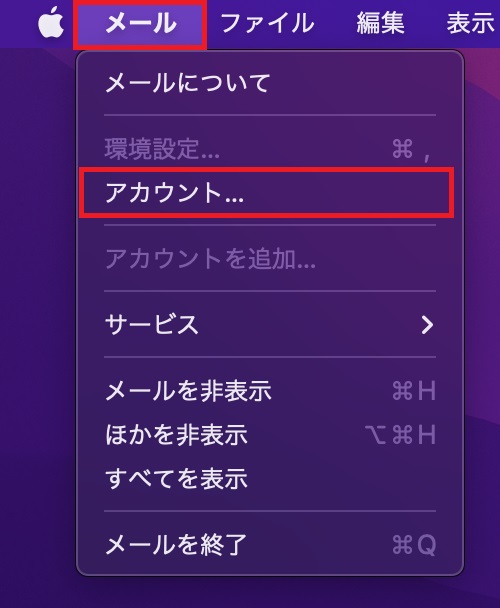
Click on [Mail] at the top of the screen, and then click on [Account...].
-
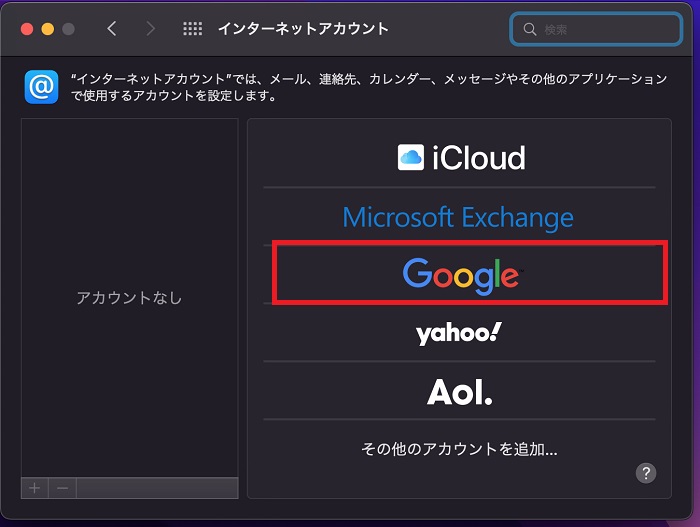
Select [Google].
-
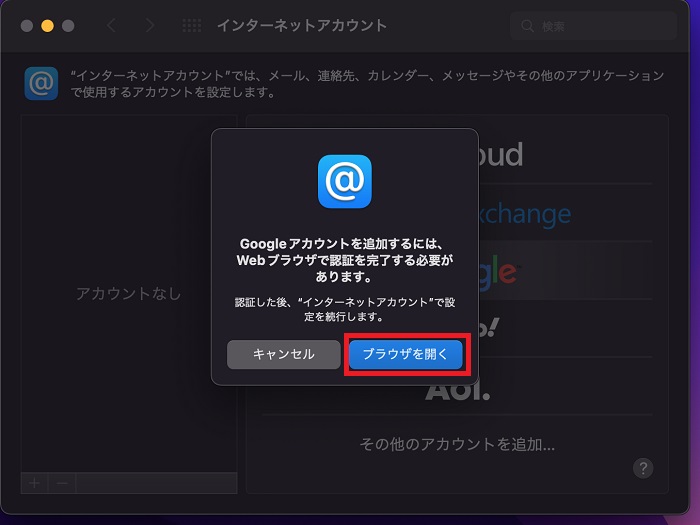
Select [Open browser].
-
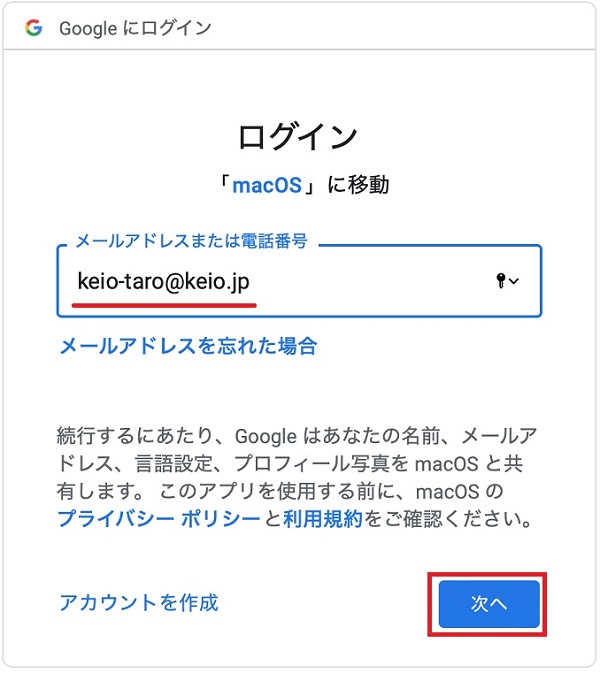
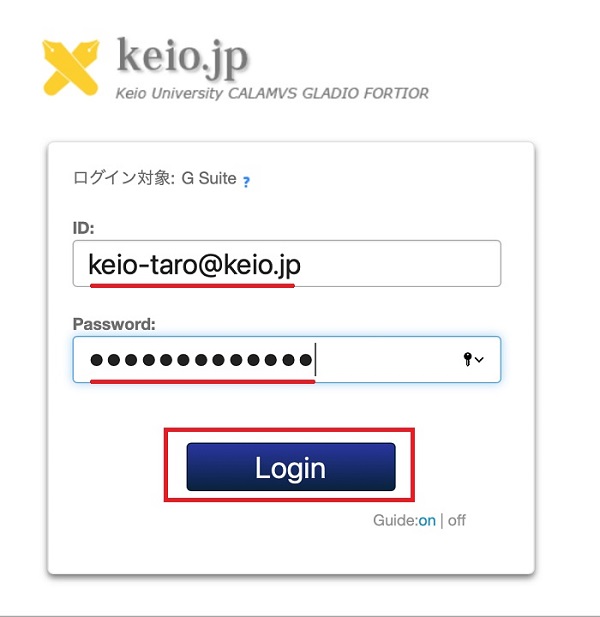
Enter your Keio ID (example: keio-taro@keio.jp), and then click on [Next].
-
Enter the ID and password you used to log into the keio.jp portal, and then click on [Login].
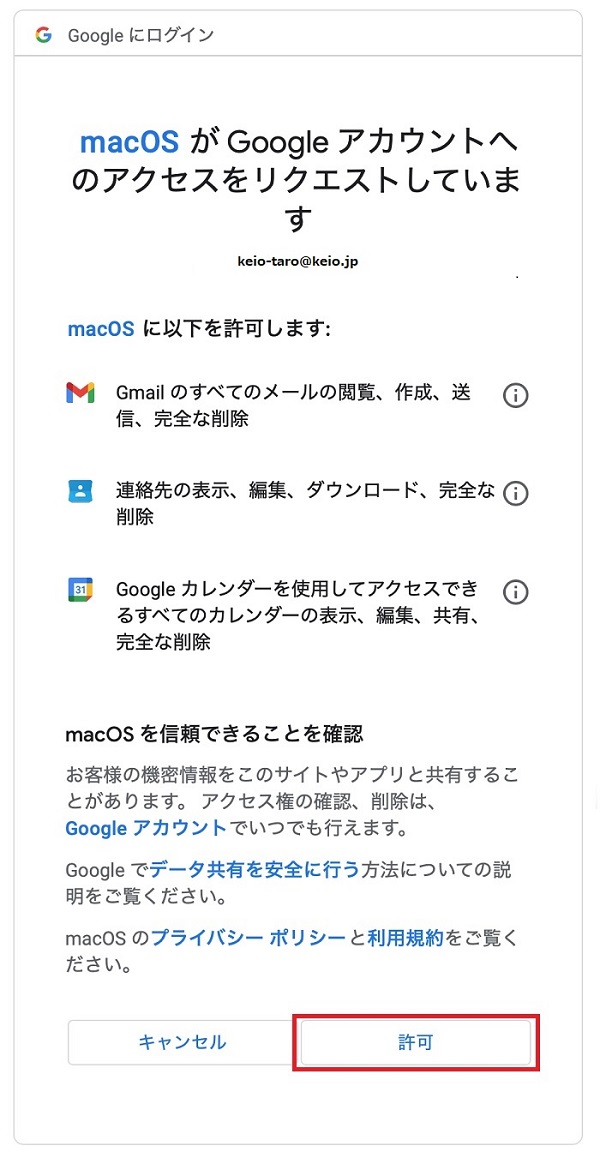
-
Click on [Authorize].
-
Select [Email], and then click on [Complete].
(Set up the address book, calendar and memos in accordance with preference.)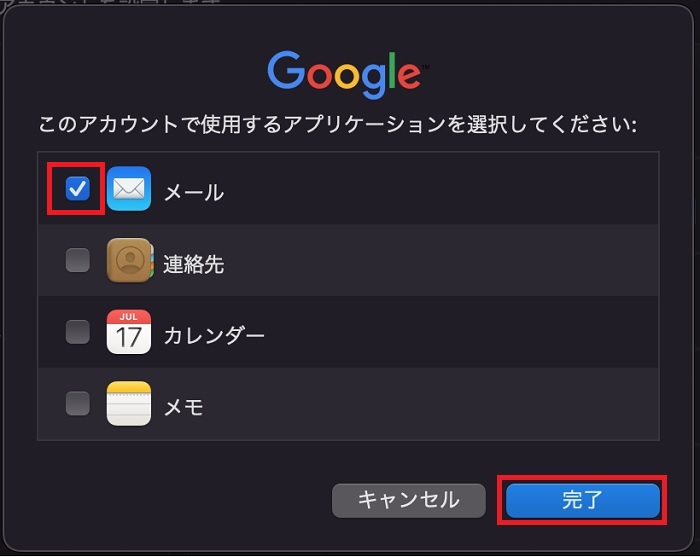
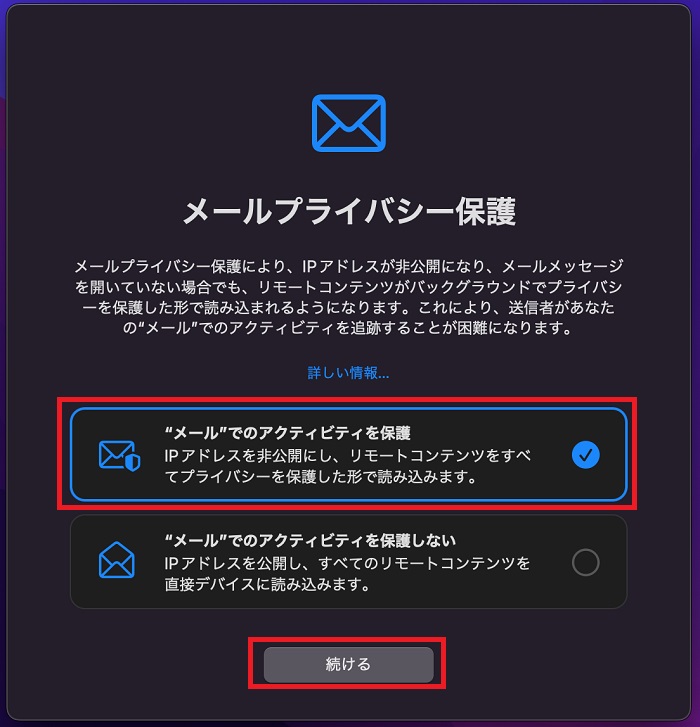
-
If [Protect email privacy] is displayed, select [Protect email activities], and then click on [Continue].
A certain amount of time may be required for the settings.
Check to make sure you are able to send and receive email.
Last-Modified: April 13, 2022
The content ends at this position.