


Webex Users Manual (operations by host)
Operations by host
Logging in
Logging in from a PC
Access Webex Click on the corresponding link.
Faculty members: https://keio-staff.webex.com
Students: https://keio-students.webex.com
-
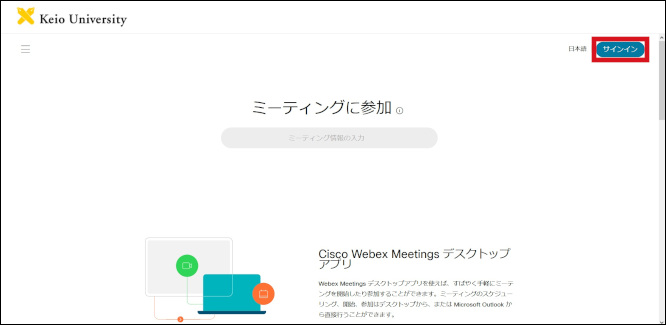
After the Webex login screen has been displayed, click [Sign In] at the top right of the screen.
-
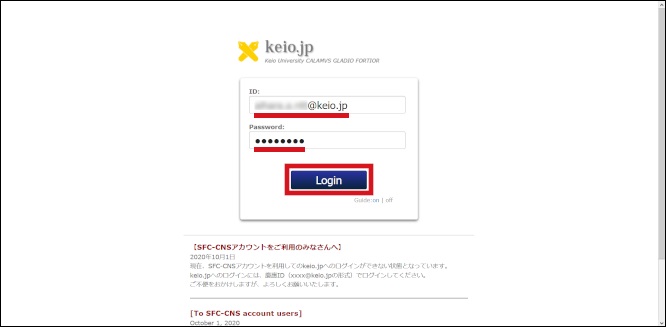
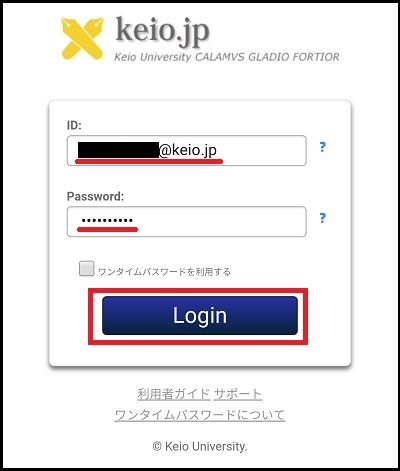
You will be asked for keio.jp authentication, so please log in by entering your Keio ID and the password that you have set.
-
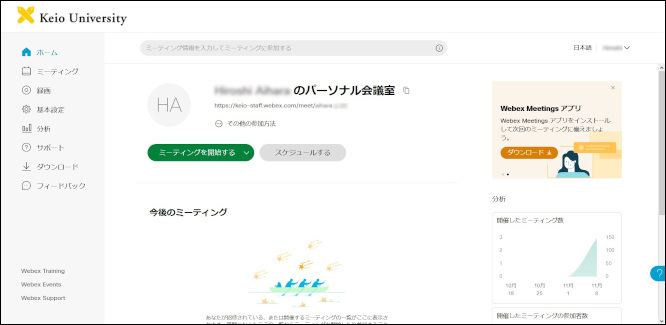
There is a function called “Personal meeting room”, and you can open a meeting at any time using the same URL (https://keio-xxxxx.webex.com/meet/xxxxx).
Or you can also hold a meeting by registering a schedule. For the procedure, see “Schedule and register a meeting room.”
Logging in from Android
It is necessary to install Webex Application (Cisco Webex Meetings).
[Reference] Android:https://play.google.com/store/apps/details?id=com.cisco.webex.meetings&hl=en
- Start from the Webex application that is installed on your device.
-
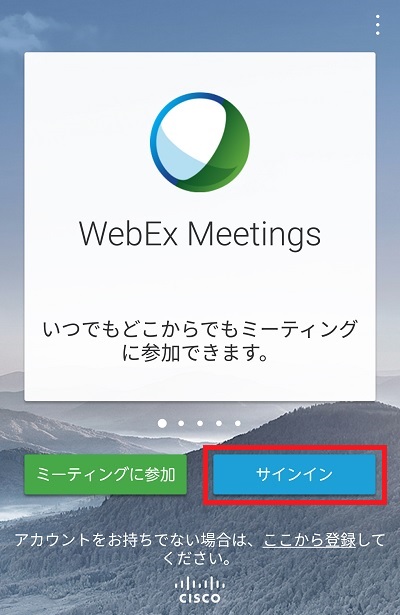
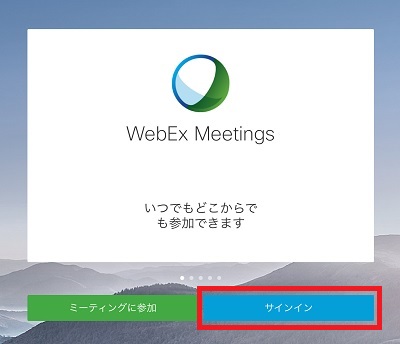
In the status, before log in when the application has started the first time, the following screen is displayed, so select [Sign in].
-
After it has switched over to the following screen, enter your keio.jp ID and select, [Next].
(Note: An old domain format such as @z8.keio.jp, cannot be used. Be sure to enter in the @keio.jp format.)
-
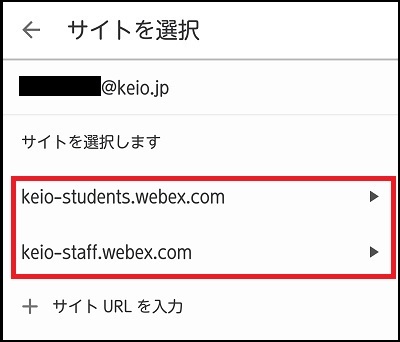
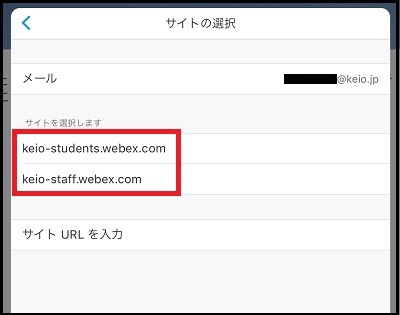
The site selection screen appears so students select [keio-students.webex.com] and faculty members select [keio-staff.webex.com].
-
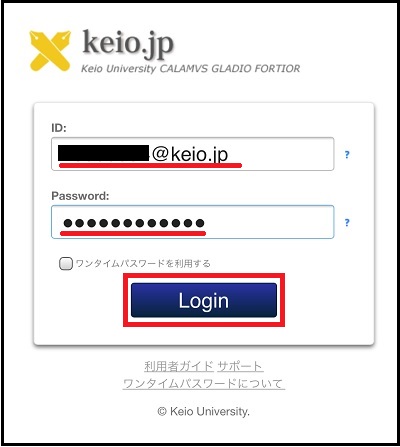
Log into keio.jp.
-
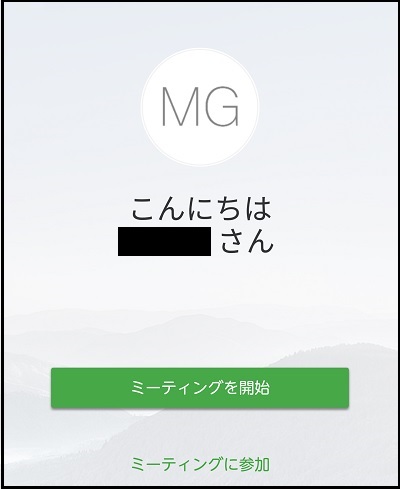
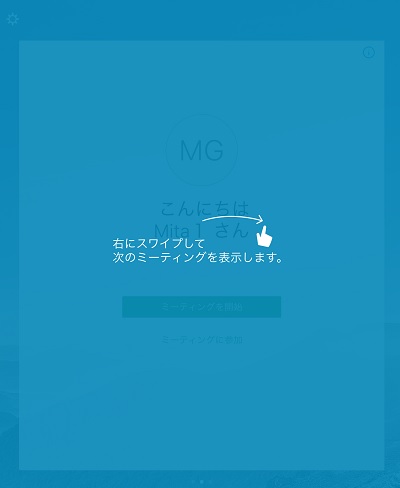
Once you have logged in, the Webex screen will be displayed.
Logging in from iOS
It is necessary to install Webex Application (Cisco Webex Meetings).
[Reference] iOS: https://itunes.apple.com/us/app/cisco-webex-meetings/id298844386?mt=8
- Start the Webex application that was installed on your device.
-
In the status, before log in when the application has started the first time, the following screen is displayed, so select [Sign in].
-
After it has switched over to the following screen, enter your keio.jp ID and select, [Next].
(Note: An old domain format such as @z8.keio.jp, cannot be used. Be sure to enter in the @keio.jp format.)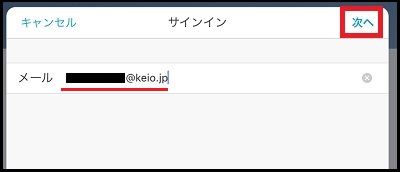
-
The site selection screen appears so students select [keio-students.webex.com] and faculty members select [keio-staff.webex.com].
- Log into keio.jp.
-
The message, [Can this page be opened with “Webex”?] Is displayed, so select [Open].
-
Once you have logged in, the Webex screen will be displayed.
Registering a meeting
- If you want to start a meeting immediately
- If you want to schedule a meeting in advance (case where it will not start immediately)
If you want to start a meeting immediately
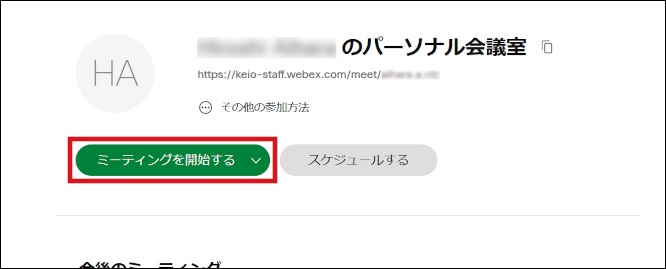
-
To start a meeting immediately, click [Start a meeting] on the screen.
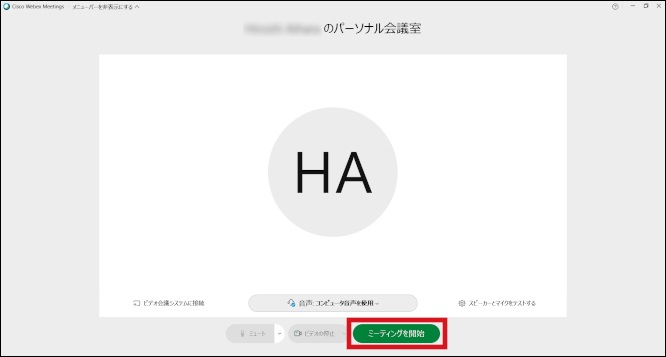
-
The screen changes to the Webex Meeting Room. Click [Start Meeting] for starting Webex meeting.
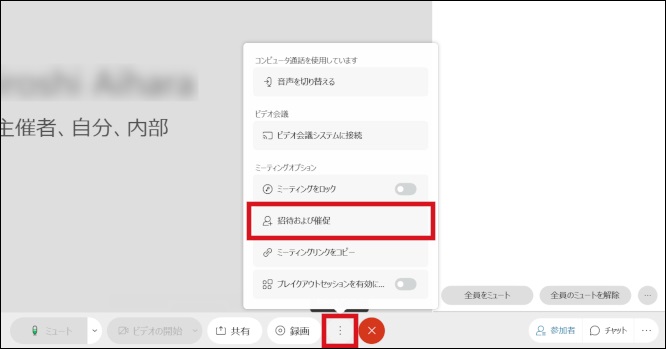
-
Webex Meeting is started. If you want to invite or remind participants, click [More options] and choose [Invite and Remind] on the menu.
-
Enter the e-mail addresses of participants you wish to invite, and click [Send]. After sending has been completed, click [Done].

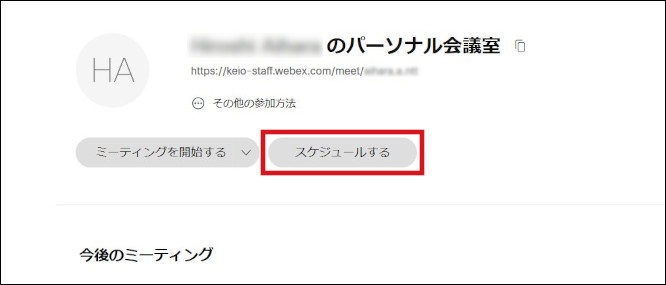
If you want to schedule a meeting in advance (case where it will not start immediately)
-
If you want to schedule a meeting in advance, click [Schedule].
-
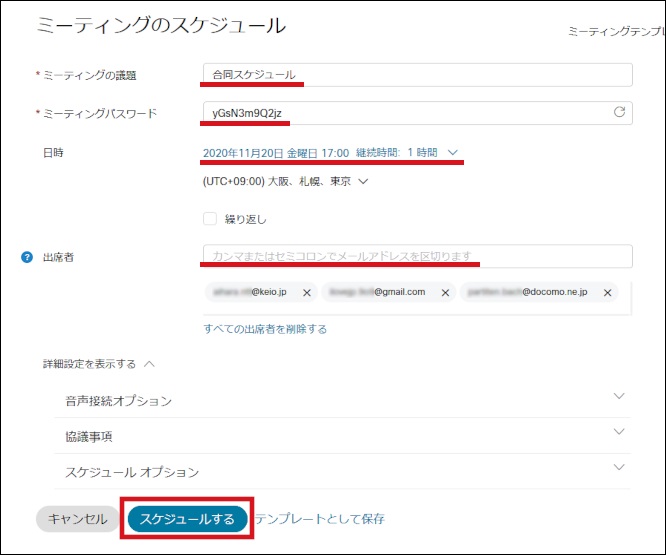
The meeting schedule screen will be displayed, so enter the required items to register the scheduled meeting. And if you wish to make more detailed settings, click [Show advanced options] and setup each menus.
[Meeting topic]: Enter the meeting name you wish.
[Metting Password]: A default password is provided, but you can also set and use your own password.
[Date and Time] Set the date, time and duration.
[Attendees] Enter e-mail addresses of participant. If there will be multiple participants, enter e-mail addresses separated by commas or semi-colons.
-
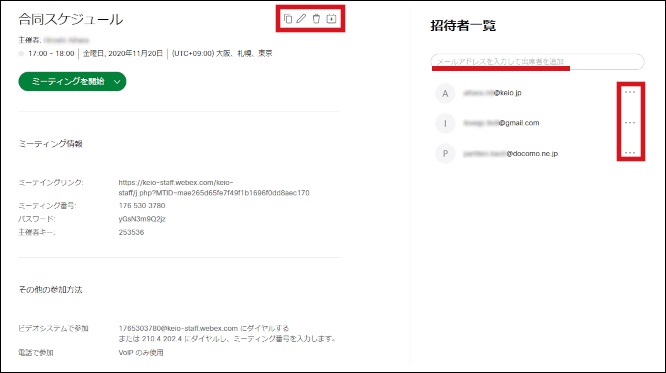
The following screen appears after you have completed registration. If you want to copy, modify, cancel or add to another calendar app, click on the each icons next to the meeting topic. Or you want to change addresses of participant, edit addresses of [Who is invited?].
-
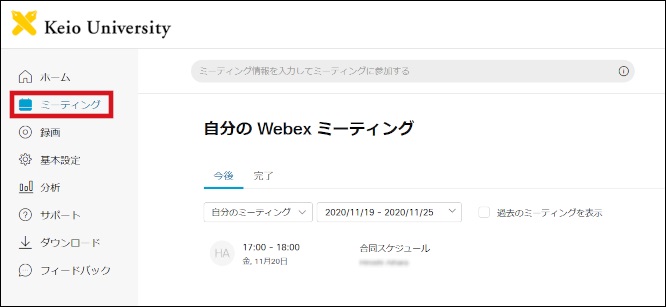
The reserved schedules are registered in [Meetings] and you can view the past schedules.
Settings during the meeting
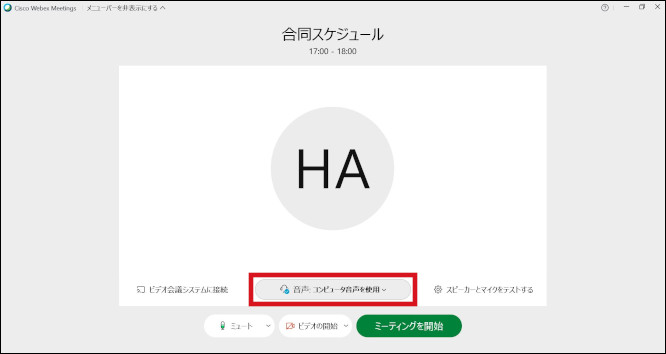
After a host has participated in a meeting, a screen such as the following appears.
If the host does not connect to audio, participants will be unable to connect to audio, so be sure to connect to audio.
Please continue to read explanations of functions.
Last-Modified: November 20, 2020
The content ends at this position.